How to Use Virtual PC to Run Windows XP on Windows Vista
In this scenario, we are running Windows Vista and wish to run another Operating System such as Microsoft Windows XP in a virtual environment. One such reason to do this, for example, is if you have a custom software application that will not run or is not supported under Vista. This guide is meant as a general overview of the How to Use Virtual PC to Run Windows XP within Windows Vista Install process and not an exhaustive installation manual. How to install Microsoft Virtual PC 2007While Virtual PC 2007 is free, you must still have the installation media and license for any virtual operating system you install. Visit the Microsoft website and search for Virtual PC for the most recent version of the software. Once you are ready to install, follow the download link from the website above and download the correct version (32 BIT/64 BIT) to your computer. Double click on the setup.exe file from the location you downloaded the application too. Click Next.(In most cases, you will be able to simply accept the default settings)Accept the license agreement, Click Next. Verify your username and Organization is how you would like them to appear and whether or not you would like to install this application for anyone or just yourself. Your Product Key will automatically be filled out. Click Next.
Verify your installation directory, Click Install. Once the installation is complete, Click Finish. Configuring Virtual PC 2007Now launch the application, Click Start, All Programs, and Microsoft Virtual PC.Click New, this will launch the New Virtual Machine Wizard. Click Next. Since you will be installing for the first time, select "Create a virtual machine”. Click next. Provide the name and location for your new virtual machine file or accept the defaults. Click Next. Select the Operating System that most resembles the Operating System your installing. In this case Windows XP, Click Next. Depending on your requirements, either accept the provided recommendation for RAM or adjust the settings to suit your specific installation requirements. Click Next. Now select your virtual hard disk options, since this is a new installation, select "A new virtual hard disk". Click Next. Now provide the name and location for your new Virtual Hard Disk. Generally, unless you have a specific need to do so, accept the default values provided. Determine the size of the virtual hard disk size. Again, unless you have specific requirements, accept the default size. Click Next. You will be presented with an installation summary to review. If you are satisfied, click Finish. Installing Virtual Operating System Now you are ready to begin installation of the Virtual Operating System. In this case, we will be installing Microsoft Windows XP Professional. You will need the installation disk and product key for the Virtual Operating System you are about to install.(NOTE: Wait until you receive the warning indicator before you insert the Operating System installation CD).In the Virtual PC Console window, highlight the name of your newly created virtual machine file (there should only be one at this point). Click Start. You will see the Argon PXE Boot Agent start in a Command Prompt window. When you see the message, "Reboot and Select proper Boot device or Insert Boot Media in selected Boot device, insert the Windows XP installation CD into your CD-ROM Drive and press return. You will hear the CDROM spin up and you will see the Windows Setup screen appear. At this point, you will follow the prompts to install the operating system just like you would if you were not using this software. Once the installation of Windows XP is complete you will be able to install you XP-specific applications and run them from a virtual environment. To shut down, the virtual Operating System, click its Start Menu and select shutdown as you normally would.
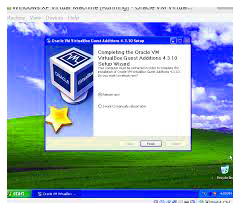
You can restart the virtual Operating System from the Virtual PC Console by highlighting the name of the Virtual Operating System you wish to start and click on Start. Final Setup Once you have your new Virtual Operating System up and running you should run the, "Install or Update Virtual Machine Additions." This can be done from the Action menu at the top of the Virtual Operating System. Click on Action, Install or Update Virtual Machine Additions, Continue. Click on Next. Once finished, click on Finish. You will be prompted to restart your computer. Tips NOTE: One additional thing to remember is that when you click inside the virtual Operating System environment your mouse will remain focused inside the window. To use your mouse outside the virtual environment, press and hold down the Right Alt key while dragging your mouse cursor outside the virtual window. TIP: USB support is not provided in a virtual environment, this can be overcome by mapping a drive from the virtual machine to the host machine using shared folders. More information about this can be found using the help menu within the Microsoft Virtual Console.


